Thursday, August 31, 2017

Lilly Pulitzer After Sale Haul

As usual, the bi-annual Lilly Pulitzer After Party was crazy this year!  As always, the site crashed and froze, but we were luckily able to get many of our favorite items at amazing prices!  Here's our haul this time!

Jess:

This sleeveless Essie dress was a steal from Zappos!

The Elsa is an all-time fave.

Can't wait to wear this classic Maisy dress.

Ry:

Love the Essie top, too.

Everybody needs an Elsa.

We're always suckers for stripes.
Wouldn't this maxidress be perfect for a summer wedding?

Love this skirt!

As you can see, we struggled to restrain ourselves!  Did you get anything great from the After Party Sale?  Let us know in the comments below and see you again in January!

Wednesday, August 30, 2017

Twins Take on the Trend: Red

We are planning to feature our take on several fashion trends this fall.  The first trend we are into is the color red!  One of the coolest things about red is that there are so many shades to incorporate into your wardrobe.  A bright red can provide a pop of color with a neutral outfit.  A burgundy red can transition an outfit into fall.

Here are a few pieces you can grab to rock red this fall!


1.  Banana Republic Ruffle Neck Crew Sweater
2.  Old Navy Jersey-Knit Swing Dress
3.  GAP Plaid Pintuck Long Sleeve Top
4.  GAP Tie Belt Shift Dress
5.  Old Navy Pixie Pant
6.  Gibson Tie Front Fleece Pullover

Later this month, we'll show you how we've been wearing all our featured trends, so watch out for that post!  Are you planning to wear red this fall?  Let us know how in the comments below!

Monday, August 28, 2017

Twins Take on the DIY: Kitchen Remodel Part 1

Hi pals, it's Jess.  My family and I have lived in our house for a while now and we've done a lot of work around the house.  One room we hadn't gotten to yet was our kitchen. When we moved in, the room was...well...colorful.

I still don't get this.  Were the previous owners Washington Redskins fans?

Our first completed project (before we even moved in) was to paint the cabinets white and the walls a light grey.

A little better, right?
We hated the original yellow and grey linoleum floor, but we just couldn't deal with replacing it.  We hoped that it was hiding original hardwood floors (like the rest of the house) but sadly, the linoleum was stuck right onto the subfloor.  We left it alone for a few years, but complained about it most days!

Finally, we decided we couldn't stand it any longer, so we started researching vinyl tiles.  We thought these tiles would be a great option because they were affordable and easy to DIY.  We checked out a lot of tutorials like this one and this one.  We decided we wanted to use grout to make them look a little more finished.  We decided to tile right onto the old linoleum instead of removing it first.  We were afraid that it would be too hard to remove after 60+ years of stickiness and didn't know what condition the sub-floor would be in.  After a little research, we measured our kitchen and drew a diagram to estimate how much tiling we would need.  Then, we finally headed to Lowes to gather materials.

Nice little Saturday going on!
We chose this tile and grout (don't forget the spacers if you're grouting).  We also grabbed supplies like two of these grout floats and grout sponges.  Then we dropped off the kiddo at Grandma's and got ready to get down!

Here's the big before look:


Smell ya later, yellow!
Our first step was to clean the floor very carefully.  You want to make sure that there's no residue or dirt on the floor so that the tiles adhere properly.  You can use TSP as you would before painting, but I just used my trusty Mrs. Meyers cleaner, hot water and a little elbow grease.


Next, we removed the quoter-round trim around the room because we wanted the tile to go all the way to the edge.  Ours was old and unpainted, so we just planned to purchase new trim and replace it after we were finished.

Yay, 60 years of grossness!
Then we (okay, my husband) did some measuring and marking so we could lay out the tile.  You want to lay it out BEFORE trying to stick it down to make sure it looks the way you want.  You might want a level and tape measurer for this part.   We found the center line of the room and worked out from there.  You will likely need to cut some pieces for the ends, so don't worry about that yet.  We adjusted our tiles slightly to accommodate our somewhat crooked wall (see Odds and Ends), you might need to do the same.


Now it's go time!  Find your center-line tile, remove the backing and start sticking.  You'll then use the spacers to make sure that you leave room (We did 1/8 inch) in between tiles so you can get the grout in later.  This part is time consuming and a bit tedious.  We worked together and listened to some podcasts (OMG, if you haven't heard How Did This Get Made? do it now!)  You might reference your straight edge or level to make sure you're working in a straight line.


I was getting a little loopy on Snapchat!
This took us until around 1:30 AM, so we hit the hay before grouting.  Here's what we looked like at the end of Day One.


Cameo by my husband's knee pads!
Armed with coffee, we started up on Day Two.  While my husband finished cutting the custom tile pieces to fit into the smaller spaces (you can do this pretty easily with sharp craft scissors or a box cutting knife), I got my grout on.  Make sure you buy grout that is meant for vinyl tile and pre-mixed.      You'll also need a bucket with water to rinse your sponge and I also used some paper towel to minimize mess.

It's grout time, y'all!
I started in a less visible area because I was afraid I'd mess up!  You want to drop on a fair amount of grout onto the float and then push it gently into the space between tiles. Once you have spread out the grout, you need to run the level across the grout at a 45 angle to level it and remove excess.


Then you want to get your sponge damp (make sure you squeeze it to make sure there are no drips of water) and gently rub off the excess grout.  I rinsed the sponge often, to try to make sure you remove as much of the grout as you can.  You may have to do this to remove any grout residue).  I found this process very similar to frosting a cake after a crumb coat!


Now, repeat this about a million times!  If I thought laying the tile out was time consuming or tedious, I had no idea.  Our process was a little faster once my husband finished cutting tile and helped grout.

Not too shabby, right?
Finally, we were done and stood back to admire our hard work!  You'll want to avoid stepping on the grout to let it cure for at least 24 hours (a great excuse to get ourselves invited to dinner at Ry's!) and avoid getting it wet for around a week.

Here's the finished look!


Hooray!
A pretty big difference, right?  We plan to continue our small remodel by adding the trim, learning up and adding a new table and bench seating, so I'll update you all once it's all finished.  I am impressed with how big of a change we could make in such just a couple of days.  Here are some last odds and ends to keep in mind before you get to work!

Odds and ends:

  • Getting started is hard, but JUST DO IT!  Before we started to grout, I was so afraid I would mess it up that I didn't want to start.  Finally, after a pep talk with Ry, I realized I would never learn if I didn't get started.  After an hour, I considered myself a grout pro!  You never learn if you don't try, so just get in there!
  • You might want to invest in some knee pads.  This is hard work which requires a lot of bending and squatting.  It's as taxing as a tough day at the gym.  Take some Advil and be sure to take some breaks and stretch.
  • We measured everything accurately but didn't take into account that our actual walls are a little crooked!  Hey, human error, right?  We had to adjust our tiles slightly to accommodate a slight bowing of the wall.  You might have a tilt in your floor (which we also do) and some of the tiles might not adhere as well due to this.  We used a small nail on the couple of warped spots that wouldn't stick down.  
So there you have it!  Would you try installing vinyl tiles?  Let us know what you think in the comments below!  Jess out!

Friday, August 25, 2017

Friday Pick-Six: 8/25/17

Here's what we are loving and living for this week!

1.  As much as we love summer, we always look forward to wearing fall clothes!  There's something so cozy and cool about booties and blanket scarves.  Jill from Good Life had a great post this week about the 13 new pieces you need for fall.

2.  Our favorite workout, Pure Barre, just added a great new class called Empower.  It incorporates the great burn from our regular PB class with an added cardio and plyometric component.  We are trying it out this weekend and cannot wait/are going to be so sore!

3.  I've been on the hunt for the perfect paint color to change up our master bedroom.  We painted it upon moving in a few years back, but didn't test the color first and it came out differently than we hoped (too light).  As we've been looking at chips to repaint, I came across this great article from DIY geniuses, John and Sherry at Young House Love.  Look forward to an upcoming post this fall documenting our search and final choice!  --J

4.  One of our favorite blogs, Go Fug Yourself, had a great retrospective of all of the outfits that our BFF Kate, the Duchess of Cambridge, rocked this year.  Check it out and be prepared to be jealous.  So many beautiful looks.

5.  Sunday is the Game of Thrones season finale!  You can catch up on HBO Go if you need to prepare for the final episode.  We plan to be glued to our TV on Sunday at 9:00.

6.  After manicures earlier this week, our new favorite shades are CND Shellac Creekside (Jess) and OPI Tiramisu for Two (Ry).


What are you loving and living for this week?  Let us know in the comments below and TGIF!

Thursday, August 24, 2017

Twins Take on the Sale: Lilly Pulitzer After Party Sale!

We love the preppy and pretty prints of Lilly Pulitzer, but not the price tags!  That's why we get serious about the bi-annual Lilly Pulitzer After Party Sales.  If you're already a Lilly shopper, then you know that these sales are no joke.  Prices go WAY down and the internet loses its collective mind.  This year's sale starts Monday, August 28th at 8:00 AM SHARP!

After several years of successfully shopping this sale, we've got a few tips and tricks that can help you score some great stuff!

  • Preparation is key. A few days before the sale, log into the site (or create a login) and make sure your information is up to date.  You don't want to be fiddling around on the site during the sale, trying to add your shipping address or billing information.  You might find that items go out of stock as you are trying to check out, so time is of the essence.  Traditionally, the site goes down a day or so before to prepare, so make sure you get everything set up early.  Also, download the Lilly Pulitzer app for your phone, too.
  • Get up early and get ready!  On the day of the sale, you want to be up and ready to go right when the sale starts.  Seriously, that first hour or two is craziness and you don't want to spend time starting up your computer or making coffee.  About an hour or so before the sale, start up your devices and log in (see the next bullet) so that you're ready to shop.
  • Multiple devices are a must!  When the sale starts, you'll be put into a virtual queue and let into the site in order.  Don't freak out if you are told some ridiculous number (like "You're number 45,000!"), things move quickly.  Because you want to get in as soon as you can, you'll want to try to login on multiple devices or platforms.  When we've shopped in the past, we've used two different browsers on our laptops as well as the app on our iPhones.  Once you're in and shopping, keep an eye on your other logins, because you might have more success in one platform or another.  Last year, we were able to check out in the app before online, but it's different every time.
  • Choose your favorites and start there.  We've talked about our love of the Elsa top and they go out of stock in a blink of an eye.  If you want one, start there and if you have one in your cart CHECK OUT IMMEDIATELY.  Don't waste time, just check out or you could lose your item (RIP, Elsa top in Red Right Return from Jess's cart in August 2014).  In our experience, the Elsa tops and children's clothes go first, so start there if you're interested. 
  • Check out as many times as you need.  Shipping is free, so if you have an item or two in your cart that you really love, just check out.  You can always go back into the sale (you'll be put into the queue again, so keep that in mind), but checking out ensures you get the stuff you want. Things will disappear from your cart (they're not saved for you until you check out), so move quickly.  
  •  Don't get too carried away!  The prices will be low and it's easy to get swept away in the chaos.  You might be tempted to grab items just because they're great deals, so it's easy to crush your budget.  We usually set a dollar amount budget for ourselves ahead of time and stick to it. It might also work to set a limit on the number of items you want or the styles (i.e. one dress, one top and shorts).  
  • Don't forget other Lilly retailers.  Lilly retail stores, Amazon, Zappos and 6pm will also be marking down Lilly items.  Some of our best scores have come from these sources, so be sure to visit those sites.  Sometimes they have different stock items on sale, or more color options so check them out.  It pays to make sure your shipping and billing info is up-to-date here too, although things don't seem to fly out of stock quite as quickly.
  •  All sales are final.  Final sale items cannot be returned, so make sure you want what you order.  If you're interested in sizing info, check the Lilly site or Nordstrom, so that you can make sure things will fit properly.
So there you have it, our tips for one of the best sales of the year!  We'll be checking in on Instagram stories on Monday to update you on our experience and our haul, so follow us there.  Good luck and happy Lillying!

Wednesday, August 23, 2017

Twins Take on the Trip: The Outer Banks, NC

We have been taking an annual Girls Trip to The Outer Banks in North Carolina for many years now!  It's one of our favorite things about summer and we look forward to it every year.  This stretch of islands along the coast of North Carolina offers great beaches and beautiful weather.  Here are our tips if you decide to visit OBX!

Getting There:
The closest airport is Norfolk (ORF) if you plan to fly in.  Depending on where you stay on the Outer Banks, it will be in the 1.5-2 hour drive from the airport.  Since the Outer Banks is right along the coast, there's basically one main way to get there (Highway 158 and the Wright Memorial Bridge).  If you're driving in (especially on Saturday, the traditional check-in day), plan on sitting in traffic for a while.


Stay:
There are tons of great lodging options up and down the Outer Banks.  We are partial to the Kill Devil Hills area, but we have known folks who have loved Duck, Nags Head or even Hatteras Island. We recommend renting a house or condo, rather than a hotel to give you a relaxing, personal experience.  We also like this option because with a kitchen, you are able to cook at home and spare yourself the hassle of going out each day (see below).  Also, according to our mom (and our mom is always right), ALWAYS spring for ocean front not just ocean view.  It's ALWAYS worth it.

Oceanfront is always better!

Visit:
We are pretty laid back vacationers, so we don't spend a lot of time sight-seeing.  Our main activity everyday is laying on the beach (Rent your chairs here) and reading.  If you're into water sports, rent a kayak or paddleboard and head out on the ocean.  You can fish, bike and bird-watch if you're outdoorsy.  If you're into shopping, there are tons of local shops.  One of our favorites is The Christmas Mouse, where you can find thousands of Christmas ornaments in any theme!

This tree was Irish themed!
Eat:
As we hinted above, although there are a ton of restaurants on OBX, but this kind of a case of quantity over quality.  Many of the places offer mediocre vacation food (think burgers, fish and fries) and long wait-times.  For most of our visit, we prefer to cook at home and enjoy more time at the beach, rather than waiting for a table at a restaurant).

That's not to say that there aren't a few place worth visiting.  Our favorite breakfast spot is Stack 'Em High, a family owned pancake house with two locations in Kitty Hawk (3801 N. Croatan Hwy) and Kill Devil Hills (1225 S. Croatan Hwy).  You can't call ahead or put your name in, you just wait in line until your turn arrives.  We love the pancakes, french toast and southern-style biscuit sandwich.


Another favorite restaurant is Tale of the Whale (7575 S. Virginia Dare Trail, Nags Head).  Arrive early enough to sit on the deck and enjoy a signature cocktail and live music.  The crab cakes and shrimp and grits are our favorites!


Odds and Ends:

  • Many rental properties are rented by the same families year after year during the same weeks.  Because of this, if you're traveling in the summer, you'll want to book in advance!
  • We aren't kidding about the traffic on arrival and departure.  Most rental properties feature the same check-in and check-out times, so most folks are coming and going at the same time.  Plan ahead by arriving early and hitting a public beach or shopping if you want to avoid the gridlock.
So there you have it--our tips to have the best Outer Banks trip you can!  Have you been there before?  Let us know if you have any favorite spots in the comments below!

Monday, August 21, 2017

Twins Take on the Brand: Kendra Scott

We've long been fans of Kendra Scott jewelry!  Her styles are modern and natural with a unique twist.  In addition to the classic staples we have loved for a long time, her new arrivals for fall are awesome!  Here are some of our favorite Kendra Scott pieces!


1.  This Marlowe Long Pendant Necklace in bordeaux color is on trend for fall and would be a great add to a simple sweater dress.  This is in Ryan's cart right now!

2.  These Danielle earrings go with anything and this turquoise is Jess's favorite color!

3.  The Zosia Long Pendant Necklace has three removable charms so you can customize your look.

4.  The ear climber trend is here to stay and we love this Clarissa pair.  The garnet is our birthstone and we also love the black granite for fall/winter.

5.  We like a bracelet stack, and this simple Ott gold bar bracelet with a little sparkle would be perfect for one.

6.  These Lyn Gold Statement Earrings are great for work or date night!

Do you love Kendra Scott as much as we do?  What are your favorite pieces?  Let us know in the comments below!

Friday, August 18, 2017

Friday Pick-Six: 8/18/17

Here's what we're loving and living for this week!

1.  One of Jess's favorite sandal brands, Jack Rogers, is having a Warehouse sale online this year!  This is a great chance to get a deal on some sandals you can wear for the rest of the summer and next year!


2.  Did you know that there will be a total solar eclipse on Monday, August 21st?  If you want to check it out, make sure you do it safely by following these tips from NASA.

3.  Everyone wants to get more organized and this week we were inspired by listening to an interview with the founders of The Home Edit on Young House Love Has a Podcast.  Their blog and Instagram are beautiful and offer lots of ways to organize and beautify your home.  We can't imagine having closets and pantries that large (and organized) but it's great to look!

4.  We are pretty big Amazon Prime fans, but this summer we have also been enjoying Amazon Music.  For a small amount (starting at $7.99/month) you can have access to tons of songs on your Alexa, phone, Kindle, etc.  We use this all the time!  Jess's kiddo even knows how to ask Alexa to play the Moana soundtrack (for the millionth time!)

5.  Although we are sad to see the Merona line getting phased out at Target, we are liking the preview of A New Day, the replacement line for women.  We hope to feature this more after it officially drops on August 27th.  You might be able to catch this stuff in stores already, though.  Our local Target has had it out for a couple of weeks.


6.  This Italian-style fried rice looks like just the way to use up the zucchini and tomatoes that are everywhere right now!  Gotta love Smitten Kitchen!

What are you loving and living for this week?  Let us know in the comments below and have a great weekend!

Wednesday, August 16, 2017

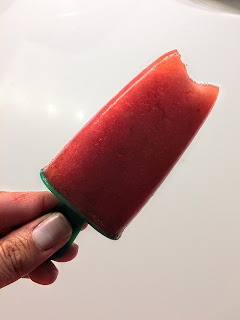
Strawberry Watermelon Popsicles

Hi friends, it's Jess.  Last week, watermelons were on sale at the grocery store for only $2.50, so I grabbed one that weighed more than my preschooler.  Needless to say, we had more watermelon than we could eat on its own, so I looked for some recipes on Pinterest.  I found this super easy three ingredient watermelon-strawberry popsicle recipe and decided to give it a go!

Here's all you need to get going--watermelon, strawberries, a lime, blender and popsicle molds!


Basically, you just add everything to the blender.  I know, super complicated, right?


We like lime a lot, so we added both the juice and the zest.


Blend it and then pour into your molds.  Ours are from IKEA, but you can find popsicle molds all around in the summertime.  Try the Target Dollar Spot!


Freeze these babies for 3-4 hours and that's it.  Popsicle time, y'all!


Grab a watermelon while they're out this summer and make these popsicles!  Let us know how it goes in the comments below!  Happy Summer!!

Monday, August 14, 2017

Twins Take on the Brand: Who What Wear for Target

We love shopping at Target for everything, including clothes.  We were sad to see that Target is getting rid of the Merona brand, but always enjoy the Who What Wear line.  Here are some of our current favorites in the Who What Wear collection!


1.  This ruffle-trim shell would be adorable with skinny jeans and ballet flats or underneath a black suit.

2.  You can wear this lace mini-dress now with sandals or with opaque black tights, booties and a black blazer in the winter.

3.  These velvet strappy block heels scream holiday party!  Pick them up now!

4.  We love a grey t-shirt and this one is slouchy enough to wear casually with leggings and New Balances or on date night with faux leather leggings and moto booties.  Multi-tasking for the win!

5.  This color-block scarf is the perfect way to take your outfit into fall.  Jess is addicted to wearing blanket scarves and this one has to be added to the collection.

6.  This basic-with-a-twist sweater with tie sleeves is classic and work approved!

Do you have any items from the Who What Wear collection?  Let us know in the comments below!

Friday, August 11, 2017

Friday Pick-Six: 8/11/17

Here's what we're loving and living for this week!

1.  We've been looking for a new show to binge watch and we are planning to give Amazon's The Last Tycoon a try.  It takes place in 1930's Hollywood and stars Matt Bomer (from one of Jess's fave shows, White Collar), Kelsey Grammar and Lily Collins.

2.  One of our favorite things to do on our annual beach vacation is read!  The hands-down favorite book of the trip was My Husband's Wife by Jane Corry.  This book has mystery, intrigue and relationship drama.  Read it and thank us later!


3.  If you're anything like me, you have a lot of tomatoes right now!  Our garden is insane and we have more tomatoes than I know what to do with!  I saw this recipe on Real Simple's Instagram and plan to give it a try this weekend. --J


4.  One of our favorite jewelry sources, Three Sisters Jewelry is offering an extra 50% off sale items this week with the code SALE50.  There are some great deals, so check it out!


5.  Believe it or not, I cooked dinner this week!  I used this recipe to make an easy tortellini pasta salad.  I added some cubed grilled chicken and a half of a seeded jalapeƱo!  Easy and delicious! --J

6.  Sale alert!  GAP is offering up to 50% off EVERYTHING (including jeans, which are hardly ever on sale) plus an additional 20% off your order AND free shipping with the code BESTDEAL.  Check out Monday's post for some of our favorite new arrivals and get ready to shop.  You can also earn GAP CASH, too.

What are you loving and living for this week?  Let us know in the comments below and TGIF!

Wednesday, August 9, 2017

Shellac Manicures--Are They Worth It?

Everyone knows that a mani-pedi is imperative on a beach vacation.  As we prepared for our trip last week, we decided to try a little something new.  Usually we do our own nails and we're pretty great at it.  However, we were looking for something with a little lasting power, so we decided to splurge on shellac manicures at a salon.  (Okay, it wasn't a large splurge, since Jess's generous students gave her a gift card!)  We know we're a little late to the party, but we figured we would give you our review of the hits and misses of shellac!

Hits:

  • Staying Power:  Boy, did the shellac last!  We can be a little hard on our nails between typing and house work, so a regular manicure never lasts more than a week.  With shellac, our nails were still going strong long past Day 10.  Jess decided to remove on Day 11, but Ry is still rocking hers.  If you're looking for a manicure that will last you for a while, then this shellac definitely the way to go!
Day One--Love that color!
Day Nine--still going strong!
  • Color Choices:  The salon we visited used CND Shellac colors and there are so many amazing shades!  We were both looking for something bright and summery, so Jess chose Winter Glow and Ryan chose Be Demure.  


Misses:

  • Price: Obviously this varies from place to place, but in our area, shellac manicures will run around $35-50.  This would be a splurge item for us, as we can purchase several bottles of nail polish and use them MANY times for this price.
  • Removal:  Most salons provide removal service too, but we wanted to try to do it on our own. With a little help from a regular reader (Thanks, Denali!), I set out to remove her own polish, armed with cotton balls, aluminum foil and acetone polish remover.

This was sadly not as easy as I was hoping.  I think my problem was having an acetone-based remover, instead of 100% acetone (which I struggled to find at Target and Ulta).  I soaked cotton balls in the remover and applied them to my fingers and wrapped with foil.  Then I sat (and caught up on Bravo on my DVR) for about 10 minutes.  After that time, I was able to peel or scrape most of the polish off using my other hand and/or a cuticle stick.  This was kind of a tedious process (especially since I couldn't figure out how to wrap my second hand once the other was done, so I did one hand at a time).  I assume you probably get better at this over time and actual acetone would probably work better, but it was kind of a pain. -- J

Overall, we loved the look and staying power, so we could probably put up with the removal.  We'll probably add shellac in for special occasions and holidays, but stick to DIY manicures on the average week.

Do you like getting shellac manicures?  Do you have any tricks to keeping shellac going strong or removing shellac?  Let us know in the comments below!