Here's what we're loving and living for this week.
1. We usually keep it simple on our nails, but these nail art ideas got us thinking that maybe we should branch out a little. Maybe we'll try one on our next manicure.
2. We know it's not new, but we've been addicted to Fixer Upper reruns on HGTV lately. We love Chip and Joanna's style and it inspires us to tackle some house projects of our own this summer. Stay tuned for more!
3. My husband made this One Skillet Lemon Chicken and Orzo this week and we couldn't stop eating it! It would be awesome with shrimp instead of chicken, too. Plus, who doesn't love a one-pot meal? (Especially when you're the one doing dishes like I am!) --J
4. Last night was the series finale of Scandal! So much for our Thursday tradition of wine, popcorn and Olivia Pope. If you're going to go through withdrawal without this show, then look back at this amazing retrospective of Olivia's amazing fashion sense!
5. GAP is running its Spring Sale with up to 60% off and an additional 40% off with the code HAPPY. If the forecast ever looked like it would warm up, we'd definitely be stocking up on some spring stuff!
6. If you're looking for a new comedy show to watch, try The Good Place! We recently caught up on this comedy and were sad to finish it off. It took a little while to click, but by the end, I loved the characters and was cracking up. The first season is on Netflix and you can find season two on NBC's site. --J
What are you loving and living for this week? Let us know in the comments below and have a great weekend!
Showing posts with label Food. Show all posts
Showing posts with label Food. Show all posts
Friday, April 20, 2018
Wednesday, April 18, 2018
The Easiest Blondies Ever
Hi friends, it's your favorite neighborhood baker, Jess. One of the things I'm always in search of is a quick baked dessert recipe with all pantry items. You know, sometimes you just want dessert and you don't want to have to run to the store. Enter Deb from Smitten Kitchen and her Infinitely Adaptable Blondies. Once I saw this recipe, I knew I had to try it out!
Last weekend, on an uncharacteristically rainy and cold Saturday, I gathered my ingredients.
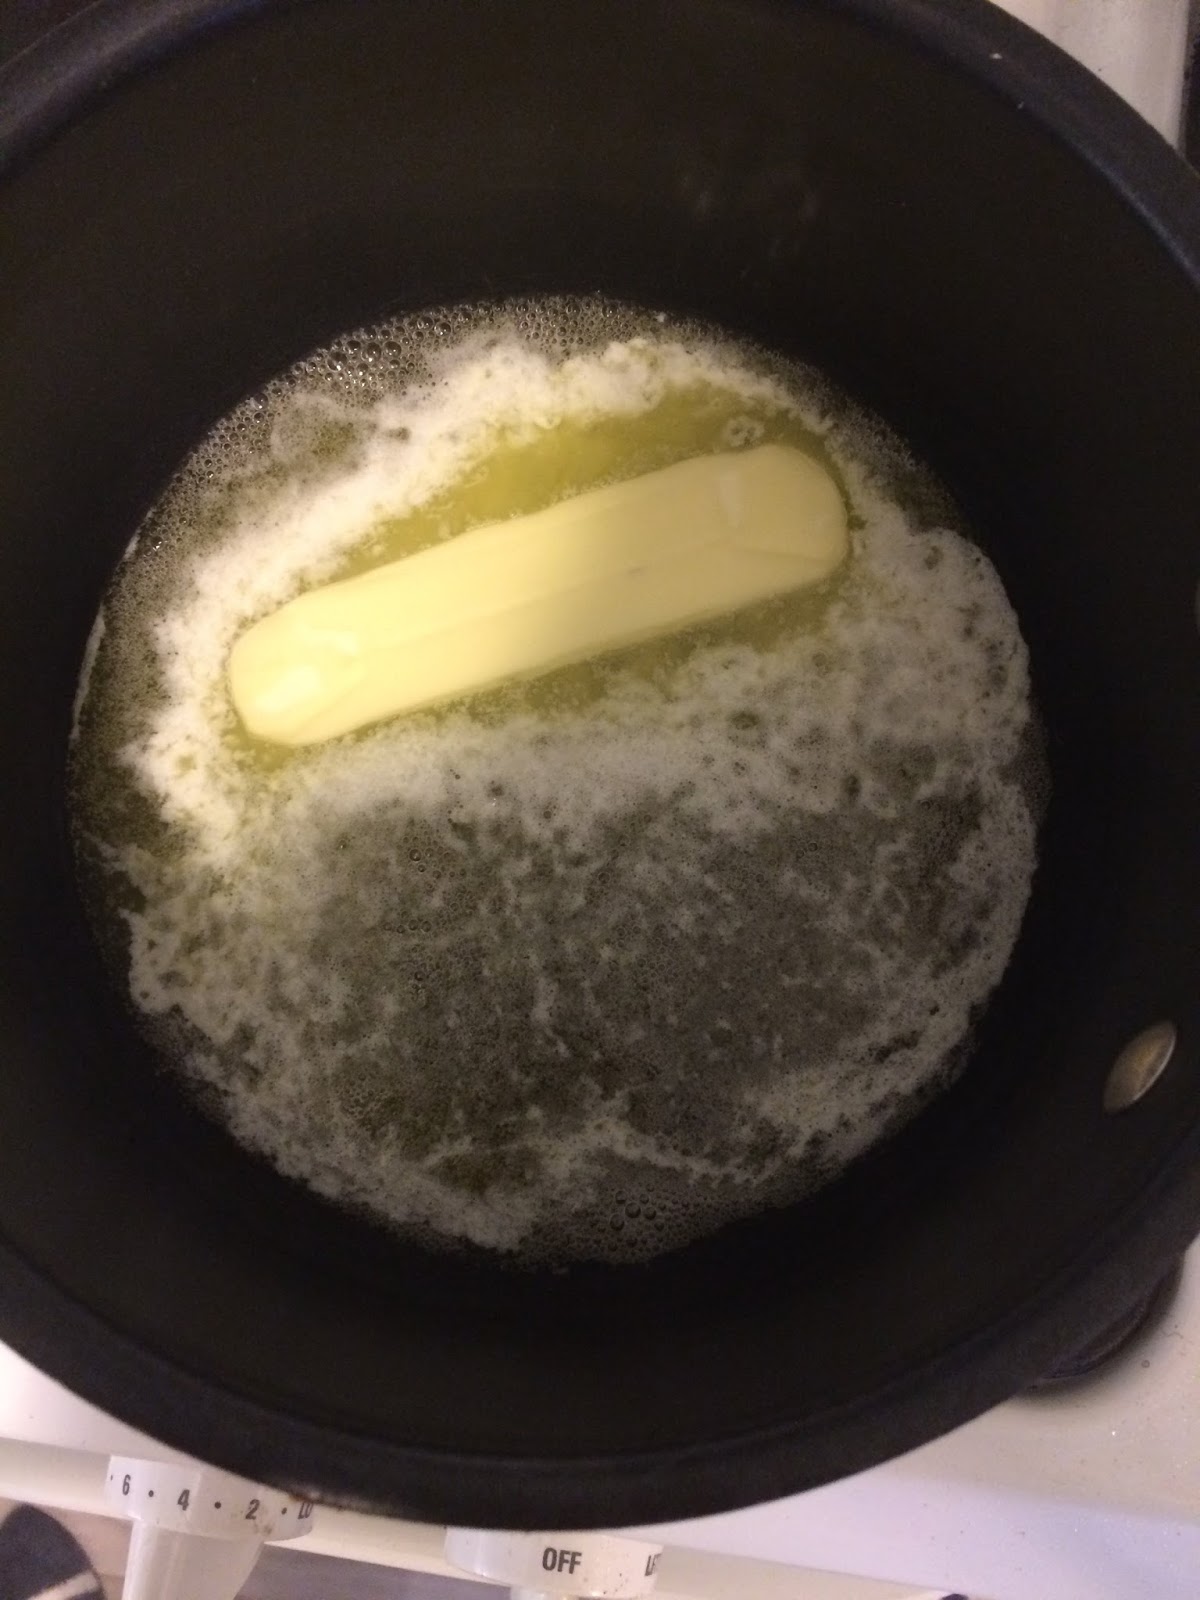
To get started, melt the butter in a small saucepan. You could just melt it, or you could be like me, and let it cook for a while and start to get brown. Nothing beats that caramely browned butter flavor, so it's worth taking the extra time.
Let the butter cool off a little bit and pour it into a large bowl. You're cooling this off just a little so that you don't get brown sugar flavored scrambled eggs. (Just typing that is gross). Then, whisk in a cup of brown sugar, vanilla and one egg.

Mix in one cup of flour and 1 1/2 cups of mix-ins. Deb mentions that you can use whatever mix-ins you have on hand. I chose chocolate chips and toasted pecans. Shout out to my Snow Bird in laws, who brought back some pecans from the winter Down South. See my notes below for other thoughts on great additions.

Press the mixture into a buttered 8x8 glass or metal tray. It's not going to pour like a usual cookie batter, so you might want to try pressing it down with a spatula or wooden spoon.

Bake for 25 minutes at 350 degrees. The edges will be golden brown and it will still feel a little soft in the middle. I think that's part of what makes the good--they're still a little fudgey or doughy in the middle. I think they'd be too tough if you overbooked them, so keep an eye out. You can cool and cut them or just let them cool in the pan and cut as you eat them. Honestly, I think they would keep for about a week covered, but we finished them off within a couple of days.

Notes:
Last weekend, on an uncharacteristically rainy and cold Saturday, I gathered my ingredients.
 |
| Not pictured: Vanilla Extract |
 |
| Before |
 |
| After |
Let the butter cool off a little bit and pour it into a large bowl. You're cooling this off just a little so that you don't get brown sugar flavored scrambled eggs. (Just typing that is gross). Then, whisk in a cup of brown sugar, vanilla and one egg.

Mix in one cup of flour and 1 1/2 cups of mix-ins. Deb mentions that you can use whatever mix-ins you have on hand. I chose chocolate chips and toasted pecans. Shout out to my Snow Bird in laws, who brought back some pecans from the winter Down South. See my notes below for other thoughts on great additions.

Press the mixture into a buttered 8x8 glass or metal tray. It's not going to pour like a usual cookie batter, so you might want to try pressing it down with a spatula or wooden spoon.

Bake for 25 minutes at 350 degrees. The edges will be golden brown and it will still feel a little soft in the middle. I think that's part of what makes the good--they're still a little fudgey or doughy in the middle. I think they'd be too tough if you overbooked them, so keep an eye out. You can cool and cut them or just let them cool in the pan and cut as you eat them. Honestly, I think they would keep for about a week covered, but we finished them off within a couple of days.

Notes:
- As I mentioned, Deb says you can mix in just about anything to these babies and create something delicious. I loved the toasted pecans and chocolate chips, but you could customize these any which way you want. Some combinations I'd love to try out--
- 1/2 cup peanut butter and 1 cup of chocolate chips
- 1/2 cup dried cherries and 1 cup of dark chocolate chunks
- 1/2 cup salted peanuts, 1/2 cup butterscotch chips and 1/2 cup toasted pecans
- 1/2 cup pistachios, 1/2 cup dried cranberries, 1/2 cup white chocolate chips
- Overbaking is the enemy of a good blondie! Watch that they don't get too brown because they'll dry out. Even if you would consider them a little underdone, they're probably ready to go.
- These are pretty rich, so you can serve them in small pieces. They would be awesome as a quick dessert to take over to someone's house or to serve after a simple dinner party. Also, kid approved (obviously!). In fact, our preschooler woke up one morning, examined the pan and asked my husband "why did you and Mama eat two blondies because they're missing from the pan..." Busted.
- One last serving suggestion would be a blondie sundae. Quick story--I was once eating dinner at our favorite neighborhood place with my husband and Ry and were gifted a free blondie sundae by our waitress. Apparently a table had ordered it, mistaking blondies for brownies and no longer wanted it. A delicious blondie sundae on the house?! Talk about a win! We still talk about it months later! Scoop some old fashioned vanilla ice cream on top and drizzle with caramel and/or chocolate syrup and you're a hero!
Make these now and thank me later! Let us know how they are and give us your ideas for mix-in combinations in the comments below!
Friday, April 13, 2018
Friday Pick-Six: 4/13/18
Here's what we're loving and living for this week!
1. Our mom gifted us with these adorable monogrammed insulated wine glasses for Easter! You better believe we'll be rocking them this summer around the pool or at the beach!

2. Are you getting as excited as we are about the upcoming Royal Wedding? If you (like us) love Meghan's style, you can check out this great post about how to copy her look yourself!
3. We spotted this new Essie Summer collection on Amazon earlier this week and had to order! Can't wait to try out At Sea Level for summer!

4. We are suckers for a good striped shirt, so we loved this Popsugar post with so many great striped options!
5. We're always hearing ads for MVMT watches and sunglasses on our favorite podcasts, so we finally had to check them out. There are so many amazing styles and the prices are great! Polarized lenses for less than $100!? Yes, please!

6. How delicious does this chicken milanese look on Happily Eva After? This would be great for a spring dinner with an arugula salad or angel hair pasta.
What are you loving and living for this week? Let us know in the comments below and TGIF!
1. Our mom gifted us with these adorable monogrammed insulated wine glasses for Easter! You better believe we'll be rocking them this summer around the pool or at the beach!

2. Are you getting as excited as we are about the upcoming Royal Wedding? If you (like us) love Meghan's style, you can check out this great post about how to copy her look yourself!
3. We spotted this new Essie Summer collection on Amazon earlier this week and had to order! Can't wait to try out At Sea Level for summer!

4. We are suckers for a good striped shirt, so we loved this Popsugar post with so many great striped options!
5. We're always hearing ads for MVMT watches and sunglasses on our favorite podcasts, so we finally had to check them out. There are so many amazing styles and the prices are great! Polarized lenses for less than $100!? Yes, please!
6. How delicious does this chicken milanese look on Happily Eva After? This would be great for a spring dinner with an arugula salad or angel hair pasta.
What are you loving and living for this week? Let us know in the comments below and TGIF!
Wednesday, April 11, 2018
Overnight Monkey Bread
Hey guys, it's Jess! I want to share one of my favorite recent recipes with you! Do you know about monkey bread? It's one of the easiest and tastiest breakfast baked goods you can make! There are lots of variations, but I love making my twist on this Smitten Kitchen recipe! Like all homemade yeast breads, this usually needs some rise time. However, with this overnight spin, you can do all the hard work the night before and just bake it off in the morning! You know how I love an easy morning


To get started, you'll need to gather your ingredients. The best thing about this is that you probably have all of this stuff in your kitchen right now!

You'll start like many other yeasted bread recipes, by heating milk in the microwave and melting butter in it. Let this cool off so that it's warm to the touch but not so hot that you can't stick your finger in it. Stir in the sugar and yeast and then let it sit for a few minutes.

Add the flour and salt in your mixer bowl with the dough hook attached. Stream in the wet mixture into the dry ingredients with the mixer running. Up the speed on the mixer until it becomes well-incorporated.

Knead it for 6-8 minutes. You could do this by hand, but the mixer makes things so much easier!

Take this out of the mixer bowl and make a smooth ball. Rub the inside of the mixer bowl with a little vegetable oil and return the dough to the bowl. Cover it with plastic wrap and let it rise in a warm spot for around an hour. If your kitchen is drafty like mine, you may want to turn the oven on to a low heat and let it sit on the stovetop. If it's really chilly, you can preheat the oven to 250, turn it off and then proof the bowl in there.
While the dough is rising, you can set up your work station. Melt butter in one bowl and mix the brown sugar and cinnamon in another. Also, butter a bundt or other circular pan. I only have an Angel Food pan, so I use that. After an hour, your dough will have risen and should look something like this--

Roll it out until you have a large rectangle. Now, you want to cut many small squares using a pastry cutter or serrated knife. You're going to cut small squares, like a grid shape. You can measure this exactly or (do what I did) and just eyeball and cut similar sized squares.


Once you have the squares, you're going to roll them into balls. Because the dough is soft, they don't roll like a meatball. You want to sort of pull the corners down until a ball forms, kind of like rolling a ball of pizza dough. It doesn't have to be perfect, but I recommend rolling them all first.

Once you have the balls done, it's Assembly Line Time. You'll dip each ball into the melted butter and then roll it in the sugar and drop it into the pan. Go around the pan until you have evenly filled it. It's not going to be all the way to the top, but don't worry about it yet. IF there's any extra butter or sugar, sprinkle it on the top.

Cover this with plastic wrap and here's where you're done for the night. Pop it in the fridge and relax!

In the morning, take the pan out of the oven and play it in a warm spot while the oven preheats to 350 degrees. You'll notice that the dough has risen a little.

I always place this on a cookie sheet before putting it into the oven. This makes it easier to get in a and out of the oven and prevents any sugar from spilling in your oven. Pop it into the oven for 30-45 minutes until it's golden brown and a little bubbly.
While it's baking, you can mix up the icing. Deb from Smitten Kitchen uses a cream cheese frosting which is delicious. However, I've also just mixed a simple vanilla glaze using 3/4 cups of powdered sugar, 2 tablespoons of melted butter, 1/2 teaspoon of vanilla and 1-2 tablespoons of milk. Whisk it all together until it's smooth.

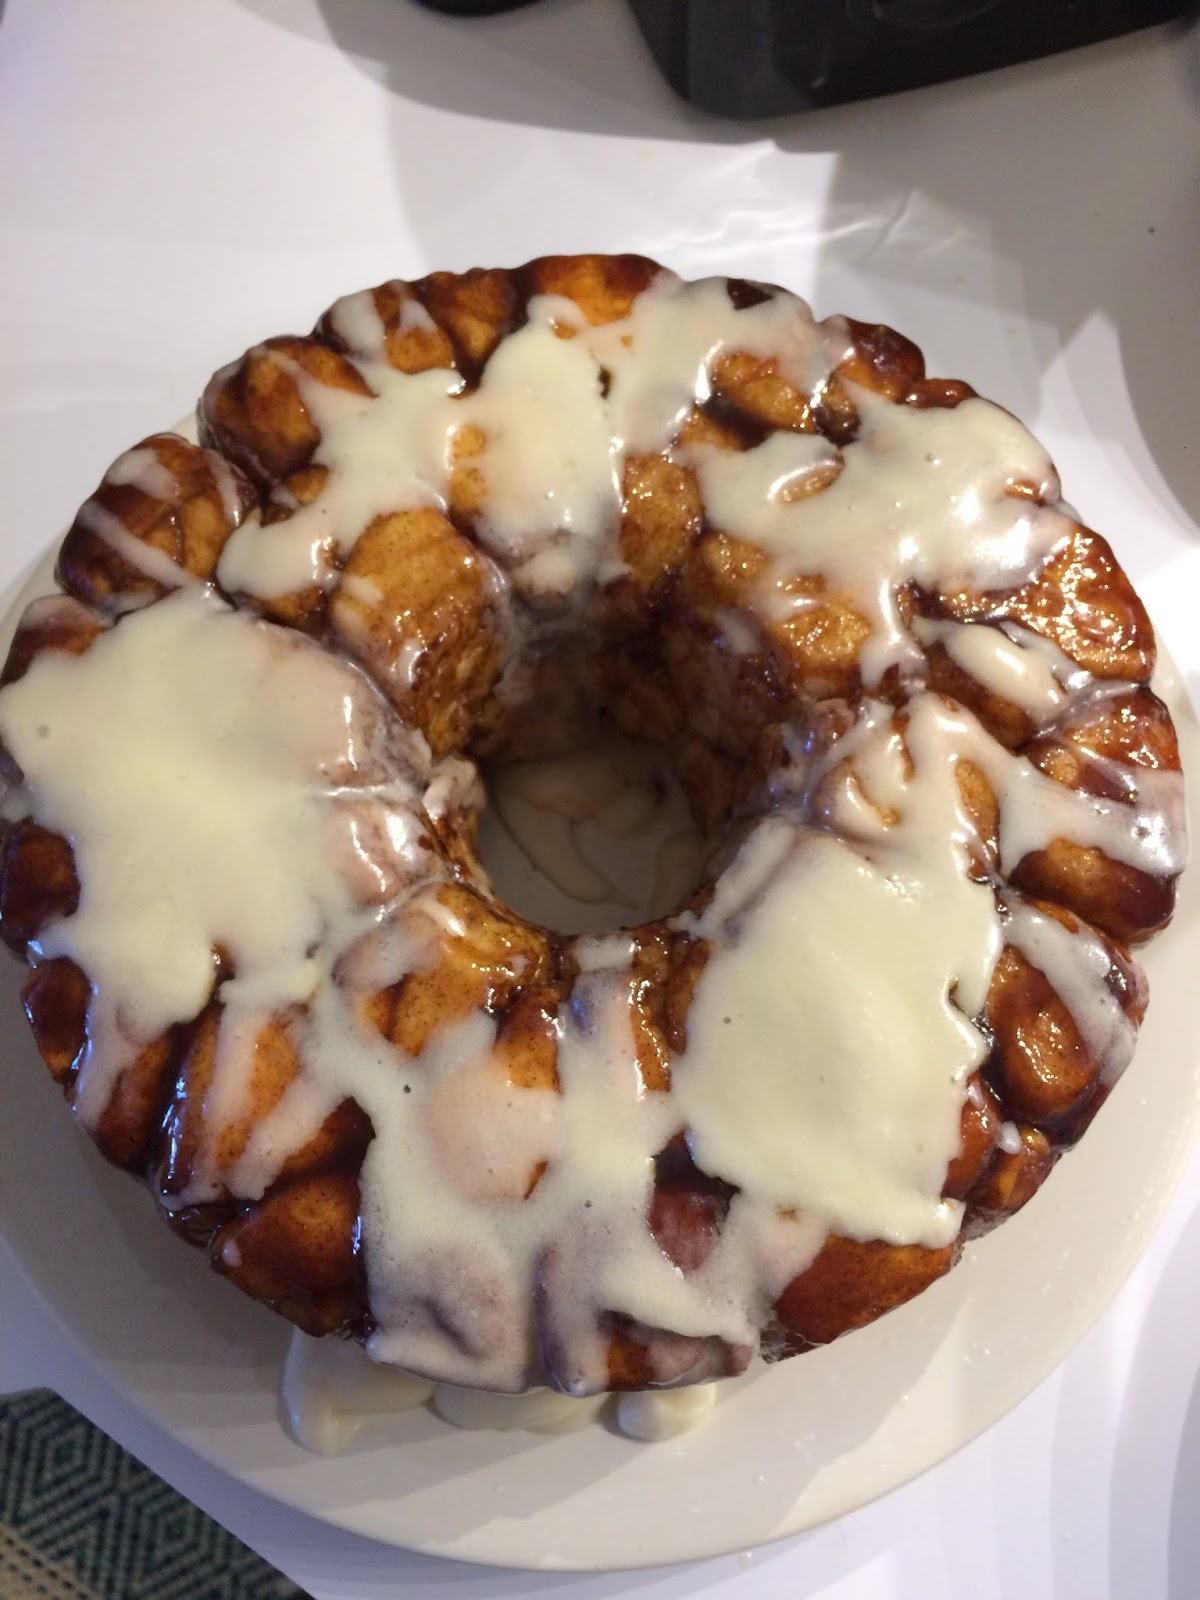
Once the bread is done, let it cool for 5-10 minutes. Then you'll invert it onto a large plate or platter. This is always my scariest moment, as I am always afraid I'll end up with a kitchen full of melty sugar! I usually make my husband do it! Once it's on the platter, you can drizzle on the glaze and then you're ready to serve!

Give this amazing recipe a try and let us know what you think in the comments! Happy Baking!
Friday, March 16, 2018
Friday Pick-Six: 3/16/18
Here's what we're loving and living for this week!
1. Last week, I saw Black Panther and it was awesome! The effects and stunts were amazing. I sure spent time this week looking up what workouts Lupita and the other stars used to get in insane shape! --J
2. Have you guys watched the new season of Queer Eye on Netflix? We were fans of the original makeover show and the new one is just as great. We love the new Fab Five and the transformations are so great!
3. I recently bought these exercise sliders after doing a Popsugar workout from David Kirsch (J-Lo's trainer). Hoping they'll make me look like JLO! --R
4. How cute are these pink Keds? Do you think I can pull them off for spring? --J
5. I used these tips for early morning travel survival on a recent trip to Las Vegas. Give them a try if you have an early morning flight coming up! --R
6. Since this weekend is March Madness, it's as good a time as any to remind you of Ry's Chex Mix recipe. We will be making it this weekend, no doubt about it!

What are you loving and living for this week? Let us know in the comments below and have a great weekend!
Friday, March 9, 2018
Friday Pick-Six: 3/9/18
Here's what we're loving and living for this week!
1. We always get excited for great Target collaborations and this week, they announced an upcoming collection with Hunter! You better believe we'll be standing in line for this one!
2. We love stripes in any season, but they're especially great in the spring and summer. Jess immediately ordered these earrings after spotting them 40% off at JCrew last week! Can't wait to rock them!

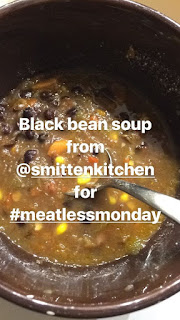
3. You guys know how much we love Smitten Kitchen and this week, we tried her black bean soup. It was awesome served up with a little avocado toast on a Meatless Monday!
4. It's time again for the GAP Friends and Family sale. Everything is 40% off and free shipping with the code FRIEND. We've got our eye on a few new arrivals for Spring including this top, and this floral dress.
5. If you're looking for a great neutral nail polish that's perfect as a spring transitional color, try Essie Mixtaupe! I tried it this week and my nails looked super professional and pretty all week! --J

6. We each pinned this recipe for Penne ala Vodka to Pinterest within minutes of one another, so it must be a good recipe! Going to have to try it out soon!
What are you loving and living for this week? Let us know in the comments below and have a great weekend!
1. We always get excited for great Target collaborations and this week, they announced an upcoming collection with Hunter! You better believe we'll be standing in line for this one!
2. We love stripes in any season, but they're especially great in the spring and summer. Jess immediately ordered these earrings after spotting them 40% off at JCrew last week! Can't wait to rock them!

3. You guys know how much we love Smitten Kitchen and this week, we tried her black bean soup. It was awesome served up with a little avocado toast on a Meatless Monday!

4. It's time again for the GAP Friends and Family sale. Everything is 40% off and free shipping with the code FRIEND. We've got our eye on a few new arrivals for Spring including this top, and this floral dress.
5. If you're looking for a great neutral nail polish that's perfect as a spring transitional color, try Essie Mixtaupe! I tried it this week and my nails looked super professional and pretty all week! --J

6. We each pinned this recipe for Penne ala Vodka to Pinterest within minutes of one another, so it must be a good recipe! Going to have to try it out soon!
What are you loving and living for this week? Let us know in the comments below and have a great weekend!
Friday, March 2, 2018
Friday Pick-Six: 3/2/18
Here's what we're loving and living for this week!
1. Last week, we featured a post about our favorite bright lip colors as one of the latest beauty trends. Check out this video tutorial on Popsugar featuring another adorable set of twins, Shanae and Shaniece Cole on how they rock this trend.
2. Her recipes are always amazing, but how good does Smitten Kitchen's take on the classic boxed macaroni and cheese look? We may need to give this a try soon!
3. After seeing this Lavender Salve on one of our favorite blogs, Sweet Southern Prep, this week, I knew I had to order it. I'm looking forward to comparing it to my old favorite, Smith's Rosebud salve.

4. We upped our Taco Tuesday game with these fridge pickled veggies this week and they were awesome. Next time, I think we'll add a jalapeno or two! I think they'd be great not just on tacos, but on a sandwich (pulled pork?), burger or whatever!

5. The Oscars are Sunday! Will you be watching? Ry hosts an annual party (complete with swag bags), so we'll be watching together.
6. If you love Meghan Markle (the Duchess to be)'s dress at her speaking engagement earlier this week, but the Jason Wu dress is too pricey, check out this article with some similar looks! We knew we loved her--she also rocks navy and black together, which is one of our favorite looks!
What are you loving and living for this week? Let us know in the comments below and TGIF!
Monday, February 26, 2018
Peanut Butter Granola Bars
Hey, all. It's your resident baker, Jess. If any of you out there have kids or nieces/nephews, you might have noticed how kids feel about granola bars. I'm pretty sure my kid could polish off three or four of them in one sitting. I love that they're a fast way to give her a snack, but I don't love the added sugar or processed nature. So that's why I decided to give this recipe for Crunchy Oatmeal Peanut Butter Oats 'N Honey Bars from Half Baked Harvest (Btw, have you guys seen this blog? Everything she cooks looks amazing and her brother is Red Gerard, recent Olympic Gold Medalist).
Anyway, to get started, I grabbed my ingredients, all of which I already had in my pantry. I substituted canola oil (see my note at the end) for coconut oil.

You'll want to mix together the peanut butter, oil and honey and microwave it in a measuring cup for around a minute. Baker tip--spray the inside of your measuring cup with cooking spray to keep the honey from sticking to the cup.

Once it's heated, add the brown sugar and vanilla and stir to combine. In the meantime, mix the dry ingredients in a large bowl.

Pour the wet ingredients into the dry and mix thoroughly. Again, you might want to spray your spatula to prevent it from sticking.

Pour it into the pan, which we sprayed and lined with parchment paper. Spray the back of a measuring cup and use it to press down the mixture. You want it to pack tightly together so that it holds when you bake. This is a great job for a kid sous chef.

The recipe says to heat the extra peanut butter in the microwave and drizzle on top. Mine never really got thin enough to drizzle, so I just sort of spread it around.

Bake for around 20 minutes and then let it cool for 10-20 minutes before slicing (see note). Now get ready to snack!

Notes:
- The recipe only calls for 2 tablespoons of oil, but I found that my mixture was a little on the dry side. As a result, the bars crumbled a little as I cut and stored them. I think if I were to make them again, I would add another tablespoon of oil and/or more peanut butter to give it a little more moisture.
- The recipe suggests you cool the bars for 10-20 minutes before slicing. I'd say, I would cut around 10 minutes of cooling. I waited longer and found that the bars were starting to get a little brittle. We'll probably eat the pieces as granola, but if you want actual bars, cut sooner.
There you have it! A great snack AND you can feel good about them because they're homemade. Give them a try and let us know what you think in the comments below!
Friday, February 23, 2018
Friday Pick-Six: 2/23/18
Here's what we are loving and living for this week!
1. On our President's Day off, we decided to move up our usual Taco Tuesday to Monday. Jess made this crockpot barbacoa recipe and it was a total hit!
2. While making an Amazon Prime order the other day, I added these beaded tassel earrings on a whim. They're not the highest quality (hence the price point) but the color is great and they're not too heavy either. --J

3. You know how we love a good face mask. One of our recent favorites is this Pacifica Disobey Time Rose and Peptide Mask from Target.

4. As much as we all love checking all our favorite blogs, I've been thinking a lot recently about trying to quit my phone habit. I have found myself playing Monopoly with my kiddo and I mindlessly grab my phone and start to check Instagram. Not my finest mom moment, but I think we can all relate. Emily from Cupcakes and Cashmere blogged about it this week and she also linked to this helpful article. I'm going to give it a try this weekend and will report back! --J
5. After seeing something similar on our favorite hostess at our favorite neighborhood restaurant, we've been on the lookout for a kimono-style jacket. We may have to scoop up this one from Target. Throw under a black tank and some skinny jeans and you're date-ready.

6. This Olympics, we were totally obsessed with Canadian ice dancers, Tessa Virtue and Scott Moir. If you're like us and you can't get enough of them, then check out their 2014 reality show which is streaming on Amazon. We might have to marathon this weekend!
What are you loving and living for this week? Let us know in the comments below and TGIF!
Tuesday, February 13, 2018
Chocolate Peanut Butter Chip Cookies
Hey all, it's Jess. What is it about baking and snowy weather? I always feel like I need to bake cookies when I see a snow storm coming on and last week was no exception. I decided to make a family favorite, chocolate peanut butter chip cookies. If you like a Reese's peanut butter cup, then these are the cookies for you!
You just need a few ingredients:

Most of these things are ingredients we always have on hand. The only real specialty ones you'll need are the peanut butter chips and the unsweetened cocoa. We actually always keep the latter around. You need it for No-Bakes and it also makes the best homemade hot chocolate!
As with most cookies, you'll mix your dry ingredients and cream the butter and sugar together.

Add the eggs and vanilla and beat the butter mixture. I always crack my eggs into a separate bowl and and whisk them first before adding them to the butter. Once your mixture is smooth, SLOWLY add your dry ingredients. I say SLOWLY because even on my mixture's lowest setting, I had cocoa powder all over myself and my kitchen! Try pulsing the mixture a bit at a time and then add speed as it gets mixed in. Finally, add in your peanut butter chips! You'll want a whole bag here, well, if you're like me the amount is a bag of peanut butter chips minus several preschooler-sized handfuls.

Scoop them out onto a tray and bake in a preheated 350 degree oven for 8-10 minutes. They'll be little soft on top when you take them out. Let them set up on the tray for a minute or two before cooling them on a wire rack. You can bake them all off, or scoop and freeze some. This time, I did about half and half, which gave me 2 dozen in the cookie jar and 2 dozen in the freezer.

And there you are! The perfect cookies for a lazy Snow Day!

They'd be perfect as a Valentine's Day treat, too! Give these cookies a try and let us know what you think! Happy baking!
Thursday, February 8, 2018
Healthy Smoothie Recipe Round-Up
Hey gang, it's Jess. Although Ry and I are not big on New Year's Resolutions, one thing I'm trying to do this year is eat more breakfast. I am notorious for getting up with JUST enough time to get myself out the door presentably. I rarely leave myself enough time to eat breakfast and as a result, I end up with just a venti latte in my stomach all morning. Not the healthiest of options. I'm trying to find more healthy breakfast options that I can grab and go.
Smoothies are great for this because they pack a lot of bang for their nutritional buck. You can stuff them full of fruits (and veggies) and start your day off right. You can pour them and drink them as you drive to work or while you get going on work, too. Also, for you mamas out there, they're super kid-friendly. I know my kiddo loves them and will happily drink them, no matter how much spinach I cram in there!
Here are a few of my favorite smoothie recipes from Pinterest.
Fruity Oat Smoothie (Makes 2 servings)
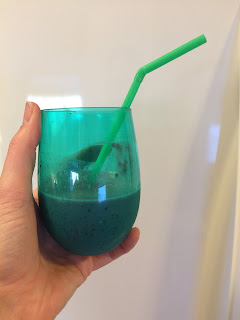
Smoothies are great for this because they pack a lot of bang for their nutritional buck. You can stuff them full of fruits (and veggies) and start your day off right. You can pour them and drink them as you drive to work or while you get going on work, too. Also, for you mamas out there, they're super kid-friendly. I know my kiddo loves them and will happily drink them, no matter how much spinach I cram in there!
Here are a few of my favorite smoothie recipes from Pinterest.
- Chocolate Peanut Butter Oatmeal Smoothie
- Triple Berry Kiwi Smoothie
- Blueberry Muffin Smoothie
- Strawberry Lime Watermelon Smoothie
Fruity Oat Smoothie (Makes 2 servings)
- 1/2-3/4 cup milk (you can use regular milk, soy, almond, etc)
- 1/2 cup vanilla yogurt
- 1/2 cup old-fashioned oats
- 1 1/2 cups frozen fruit (We use bananas and berries but anything you like works)
- Optional add-ins: 2 tablespoons peanut butter or almond butter, handful of spinach, scoop of vanilla protein powder
Pour the oats into the blender and pulse until they're powdery. Add frozen fruit, milk and blend until smooth. Depending on the consistency of your fruit and how you like your smoothie, you may want to add more/less liquid.

Do you like smoothies for breakfast? What are your favorite recipes? Let us know in the comments and give them a try!
Friday, February 2, 2018
Friday Pick-Six: 2/2/18
Here's what we're loving and living for this week!
1. You guys know how much we love crockpots, so we love this round-up of Favorite Crock Pot recipes on Cup of Jo this week.
2. If you're looking for some cute DIY Valentine's Day manicures, check out this slide show with so many ideas!
3. If you are looking for the coziest lounge hoodie, try this cozy pullover from Gillian O'Malley at Target. Seriously, Ry had it on and I immediately bought it on our Target trip a couple of weeks ago. It's so comfy and (full disclosure), I wear it around as atheleisure-wear, not just for PJs.

4. We're not big on New Year's Resolutions (most people have probably given up on them already!) but we're always looking for ways to be a little healthier. This recipe for Green Fish would be super tasty and healthy!
5. If you are looking for a killer workout, try this Popsguar kickboxing workout with the creator of The Cut, Christa DiPaolo. It claims to burn 500 calories and we believe it!
6. What are you making for the Super Bowl this weekend? We haven't decided yet on our main course, but we're betting we have a batch of Ryan's Chex Mix to snack on! If you haven't tried it yet, do yourself a favor and do it!
What are you loving and living for this week? Let us know in the comments below and have a good weekend!
1. You guys know how much we love crockpots, so we love this round-up of Favorite Crock Pot recipes on Cup of Jo this week.
2. If you're looking for some cute DIY Valentine's Day manicures, check out this slide show with so many ideas!
3. If you are looking for the coziest lounge hoodie, try this cozy pullover from Gillian O'Malley at Target. Seriously, Ry had it on and I immediately bought it on our Target trip a couple of weeks ago. It's so comfy and (full disclosure), I wear it around as atheleisure-wear, not just for PJs.
4. We're not big on New Year's Resolutions (most people have probably given up on them already!) but we're always looking for ways to be a little healthier. This recipe for Green Fish would be super tasty and healthy!
5. If you are looking for a killer workout, try this Popsguar kickboxing workout with the creator of The Cut, Christa DiPaolo. It claims to burn 500 calories and we believe it!
6. What are you making for the Super Bowl this weekend? We haven't decided yet on our main course, but we're betting we have a batch of Ryan's Chex Mix to snack on! If you haven't tried it yet, do yourself a favor and do it!
What are you loving and living for this week? Let us know in the comments below and have a good weekend!
Tuesday, January 30, 2018
Chicken Enchiladas Verde
Jess here! We have always been big fans of Mexican food and often observe Taco Tuesday. If you're looking for a twist on an old favorite this Tuesday, try this recipe for Chicken Enchiladas Verde! This recipe is based on one created by our friend, Michelle. She gave me the bones of it, but I made a few tweaks. I'd say this serves 10-12, since it filled two casserole dishes (see notes).
Getting started you'll need:


Notes:
Getting started you'll need:

- 1 package boneless, skinless chicken breasts (approx 6)
- 3-4 bottles of beer (Pick something you'd drink--no Natty Light in this one)**see note
- 2 cloves garlic, diced
- 1 jalapeño pepper, diced
- 1 yellow onion, diced
- 1 can green chiles
- 1 can black beans
- 1/2 tsp each cumin, oregano, garlic powder, and onion powder
- 1 jar salsa verde (or homemade tomatillo salsa if you're fancy)
- 1 package corn tortillas
- 3 cups of shredded Mexican cheese
In a large pot, cover the chicken breasts with the beer. Simmer on low heat for around an hour, or until the chicken is fully cooked. Remove the chicken and shred it with two forks. Place it in a large bowl. Drain and rinse the black beans and mix them with the chicken.

While shredding, allow the beer mixture to reduce until you have about 1/2 cup of liquid left. Add the seasonings and turn off the heat. Pour the liquid over the meat and beans in a large bowl.

In the same pan (without cleaning), add the onion, salt and pepper. Cook the onion until softened, about 5-10 minutes, then add the garlic. Saute for 2-3 minutes then add the green chiles. Pour this mixture into the bowl with the chicken and beans.

Corn tortillas roll best when they're heated. You can do this on a griddle pan over medium heat or on a sheet tray in the oven at 200 degrees for 5 minutes.

Alright, it's time to get your assembly line going. Preheat the oven to 350 degrees. Pour the salsa verde into a large bowl. Let's get ready to roll!

Alright, it's time to get your assembly line going. Preheat the oven to 350 degrees. Pour the salsa verde into a large bowl. Let's get ready to roll!

Spread a little salsa on the bottom of your casserole dish. Dip a tortilla into the salsa. Fill it with chicken and cheese. Then roll and place it into your casserole dish, seam-side down. Then do this again and again until the mixture is gone and/or your casserole dish is full.
Pour over any remaining salsa and extra cheese.

Then it's into the oven for 20 minutes until golden brown and bubbling! Serve it up and don't forget the chips and guacamole on the side! Add a great margarita and you're set!

Notes:
- You can substitute chicken broth if you want to make this without beer. We did half and half, frankly, so that we could save more beer for drinking!
- Michelle's original recipe mentions serving 8, but we found it could serve close to 12. If you're not serving a small army (or Michelle's three teenage sons), separate it into two casserole dishes. Let one cool completely then wrap in plastic wrap then aluminum foil and pop it in your freezer. Any leftover filling works great as a leftover burrito bowl, too. Just add some rice, salsa and shredded cheese.
- This is pretty kid-friendly, so try it out, moms. Just think about the spice level of your salsa choice, if you're serving a younger crowd. I know my kid claimed not to like "'chaladas" but then she ate some after all.
- This is a pretty forgiving recipe, so if you're a beginner cook like me, you should still try it out. I thought I had botched it pretty bad when I followed the original notes to cook the chicken in the beer for 2-3 hours. It was...well, bone dry. However, once I put it back into the liquid and covered it all with salsa and cheese, we were all good.
Give these enchiladas a try and let us know what you think in the comments below!
Subscribe to:
Posts (Atom)