Wednesday, January 31, 2018

TTO the Trend: Check Mate

One trend that we've seen around this winter and fall season is plaid, specifically glen plaid or check-style plaid.  As you know, we love plaid of all kinds, so we are down to add more to our wardrobes!  Here are a few ways to incorporate this trend into your wardrobe this season!


Top Row (Left to Right): Plaid loafer, gingham tank, plaid skirt, gingham shirt, coat

Bottom Row (Left to Right): Swing dress, PJs, dress pants, turtleneck

Have you incorporated this trend into your wardrobe?  Let us know what you think in the comments below!

Tuesday, January 30, 2018

Chicken Enchiladas Verde

Jess here!  We have always been big fans of Mexican food and often observe Taco Tuesday.  If you're looking for a twist on an old favorite this Tuesday, try this recipe for Chicken Enchiladas Verde!  This recipe is based on one created by our friend, Michelle.  She gave me the bones of it, but I made a few tweaks.  I'd say this serves 10-12, since it filled two casserole dishes (see notes).

Getting started you'll need:

  • 1 package boneless, skinless chicken breasts (approx 6)
  • 3-4 bottles of beer (Pick something you'd drink--no Natty Light in this one)**see note
  • 2 cloves garlic, diced
  • 1 jalapeƱo pepper, diced
  • 1 yellow onion, diced
  • 1 can green chiles
  • 1 can black beans
  • 1/2 tsp each cumin, oregano, garlic powder, and onion powder
  • 1 jar salsa verde (or homemade tomatillo salsa if you're fancy)
  • 1 package corn tortillas
  • 3 cups of shredded Mexican cheese
Optional additions: chopped cilantro, green onions, sour cream, extra salsa, guacamole or extra shredded cheese

In a large pot, cover the chicken breasts with the beer.  Simmer on low heat for around an hour, or until the chicken is fully cooked.  Remove the chicken and shred it with two forks.  Place it in a large bowl.  Drain and rinse the black beans and mix them with the chicken.


While shredding, allow the beer mixture to reduce until you have about 1/2 cup of liquid left.  Add the seasonings and turn off the heat.  Pour the liquid over the meat and beans in a large bowl. 


In the same pan (without cleaning), add the onion, salt and pepper.  Cook the onion until softened, about 5-10 minutes, then add the garlic.  Saute for 2-3 minutes then add the green chiles.  Pour this mixture into the bowl with the chicken and beans.


Corn tortillas roll best when they're heated.  You can do this on a griddle pan over medium heat or on a sheet tray in the oven at 200 degrees for 5 minutes.


Alright, it's time to get your assembly line going.  Preheat the oven to 350 degrees.  Pour the salsa verde into a large bowl.  Let's get ready to roll!


Spread a little salsa on the bottom of your casserole dish.  Dip a tortilla into the salsa.  Fill it with chicken and cheese.  Then roll and place it into your casserole dish, seam-side down.  Then do this again and again until the mixture is gone and/or your casserole dish is full.  

Pour over any remaining salsa and extra cheese.  


Then it's into the oven for 20 minutes until golden brown and bubbling!  Serve it up and don't forget the chips and guacamole on the side!  Add a great margarita and you're set!


Notes:

  • You can substitute chicken broth if you want to make this without beer.  We did half and half, frankly, so that we could save more beer for drinking!
  • Michelle's original recipe mentions serving 8, but we found it could serve close to 12.  If you're not serving a small army (or Michelle's three teenage sons), separate it into two casserole dishes.  Let one cool completely then wrap in plastic wrap then aluminum foil and pop it in your freezer.  Any leftover filling works great as a leftover burrito bowl, too.  Just add some rice, salsa and shredded cheese.
  • This is pretty kid-friendly, so try it out, moms.  Just think about the spice level of your salsa choice, if you're serving a younger crowd.  I know my kid claimed not to like "'chaladas" but then she ate some after all.  
  • This is a pretty forgiving recipe, so if you're a beginner cook like me, you should still try it out. I thought I had botched it pretty bad when I followed the original notes to cook the chicken in the beer for 2-3 hours.  It was...well, bone dry.  However, once I put it back into the liquid and covered it all with salsa and cheese, we were all good.
Give these enchiladas a try and let us know what you think in the comments below!


Monday, January 29, 2018

TTO the Trend: Oversized Earrings

We've been taking on some of the popular trends of the winter.  One of those is oversized earrings.  We have long been fans of a statement earring, so we're on this train for sure.  Here are a few of our favorites!


Top Row (Left to Right):  Tory Burch Hoops, Baublebar Maraca Drops, House of Harlow Hoops, Kendra Scott Olympia

Bottom Row (Left to Right):  Natasha Crystal Drops, Kendra Scott Glenda, Kate Spade Posy Grove

Will you be rocking oversized earrings?  Which ones are your favorites?  Let us know in the comments below!

Friday, January 26, 2018

Friday Pick-Six: 1/26/18

Here's what we're loving and living for this week!

1.  We've mentioned how much we love the Essie Treat Love Color line.  They provide color for your nails combined with a treatment to make your nails stronger.  We often go to this after removing our shellac to help our nails get back on track.  Essie has recently released a ton of new colors in this line and Essie Envy has a great review with swatches!

2.  We have talked about our love for the Lilly Pulitzer Elsa blouse before, but we both ordered new ones at the After Party Sale this year!  This is literally the most flattering blouse ever and we could wear them anywhere!


3.  This chicken tortellini soup looks easy and delicious.  If the weather is as cold where you are as it is at TTO Headquarters, you might want to give it a try!

4.  These cord leggings are on super sale and still available in a few sizes!  I bought them after the holidays and love them!  The stretch is great and they're as comfortable as they are cute.  Wear them to work with boots and a tunic sweater like me! -- J


5.  How cute are these gingham flats at Target?  Even though it will probably be a while before they make it into our wardrobe rotation, we may have to scoop them up this weekend on our weekly Target trip!


6.  How cute is this ruffle bodysuit at JCrew on SUPER SALE!  Ry has it and loves it!  Also, all JCrew final sale is an extra 50% off with the code SAVENOW.


What are you loving and living for this week?  Let us know in the comments below and have a great weekend!

Thursday, January 25, 2018

Twins Take on Hosting: Super Bowl Shindig

As you know, we're big football fans around these parts.  Granted, college football is our game and our Lions will pretty much never be in the Super Bowl, but we do always plan to watch The Big Game each year.  If you're planning a Super Bowl get-together for friends, here are some tips to keep in mind!


  • The game is the game.
We know some people don't really care about sports, but there's nothing worse when you're trying to follow a game closely and someone else wants to talk.  If you don't care about the game itself, find a chatting partner who is the same boat.  If you're the host, make sure that there are plenty of seats where folks can see and hear the TV easily.


  • Keep the food coming!
At a sports-watching party, we think it works best to have snack-style food, instead of a big sit-down meal.  People are going to be milling around, chatting and watching, so they might not want a heavy meal.  Think about a main dish that can sit for a little while and stay tasting great and lots of snacks to supplement it.  

Some of our best Super Bowl Parties have had chili as our main dish.  This Slow Cooker Chili is one of our favorites and it can just hang out in your crockpot and stay warm all evening!


Here are a few other recipes that are perfect for your party!
Make sure you remember to include something sweet for your guests.  We usually go with cookies, since you can make them ahead of time and they keep well.  We have a ton of favorite cookie recipes, which we'll link here!  If you want to get fancy, you can make our sugar cookies and cut them into football theme shapes and decorate in team colors.  Here are some other great desert ideas!

Will you be hosting a Super Bowl Party this year?  Let us know what you'll be serving in the comments below!

Wednesday, January 24, 2018

TTO the Trend: Blanket Scarves

If you're a regular reader, you know about our love of blanket scarves.  Not only do they look stylish, but they're a great extra layer in our current freezing temperatures!

Now, maybe you're saying to yourself, "Hey, twins.  I also love blanket scarves, but they're so huge and bulky!  How do I tie them?"  Well, look no further, here's our favorite way to tie a blanket scarf.  Please note--for this tutorial, we're using a square scarf (This one is our favorite).


  1. To start off, lay your square out flat on the floor or a bed.  Fold it from corner to corner to make a triangle.
  2. Hold the ends of the triangle in your hands.  Place the scarf so the point of the triangle is down in front of your body.
  3. Take one end of the scarf and wrap it around your neck, tucking the end underneath the front of the scarf.  Do the same with the other side.
  4. Adjust the length as needed so it's comfortable around your neck.  There you go!  If you're looking for more ways to style and wear a blanket scarf try check out Pinterest.  There are tons of great tutorials like this one or this one!


If you're looking for a blanket scarf, here are some of our favorites!


Top Row: (1, 2, 3)
Bottom Row: (1, 2, 3)

Would you rock a blanket scarf?  What's your favorite way to style it?  Let us know in the comments below!

Monday, January 22, 2018

Chocolate Chunk Shortbread Cookies

If you have an Instagram account, read a blog or basically have eyes, you've probably seen these amazing chocolate chunk shortbread cookies!  We decided we needed to make them, too, and they were pretty easy and insanely delicious!  If you want to make them, check this out!

Get your ingredients together.  


For this cookie, you'll want to use a high-quality bar of chocolate that you'll chop instead of chocolate chips.  Semi-sweet chocolate is great, so is a dark chocolate.  Chocolate chips are tasty, but the chunks of chocolate make these even better.  Chop your chocolate into chunks.  A serrated knife works best for this!

Here's one way that shortbread is different than regular cookies.  You want chilled not softened butter.  While you're chopping, cut your butter into small pieces.  We find that you can cut it and then chill it again before baking for optimal results.


Mix the butter, vanilla and sugars together in your mixer bowl until light and fluffy.  Then add the flour and mix until it looks crumbly.  This is NOT going to come together like a traditional chocolate chip cookie.  It will look kind of sandy but will clump together when you squeeze it in your palm.


Add in your chocolate chunks.  Hopefully, you don't have a preschool-aged sous chef who secretly eats so much of it that you have to chop some more...


Split the dough into two parts.  Spread out some plastic wrap and place one half of the dough on it.  Work it into a log shape.  Then do the same with the other half.  Once you've got your logs, chill them in the fridge for at least two hours.


Once chilled, preheat your oven to 350 degrees then slice the dough with a serrated knife into 1/2 inch pieces.  If you want to get fancy, brush the edges with beaten egg and roll in sanding sugar before slicing.  We didn't have sanding sugar and they still turned out great, so go figure.


Then sprinkle on the salt and bake for 12-15 minutes until the edges are golden brown.  Cool them on the tray for a minute or two and then transfer to a rack to cool completely.


There you have it!  They're like next level chocolate chip cookies!  The only challenge we had was that the dough can be a bit on the crumbly side, which makes slicing challenging.  We only had this happen one of the two times, so maybe that's reasonable?  We're not exactly shortbread experts so we don't know exactly why it happened.  Too long of a chill time?  Not long enough?  Overmixing?  Undermining?  If you know--let us know!  However, they were tasty enough that we will definitely try again.

Try them and let us know what you think!  Happy Baking!

Friday, January 19, 2018

Friday Pick-Six: 1/19/18

Here's what we're loving and living for this week!

1.  Last week, we saw I, Tonya and we can't stop talking about it.  We've been huge figure skating fans since we were kids, so we totally remember the whole incident very clearly.  In fact, we were volunteers at the 1994 National Figure Skating Championships in Detroit and we were at the venue just the day before Nancy was attacked.  Anyway, we thought this was an interesting and sometimes funny take on all of the drama.  Plus, Allison Janney is amazing!

2.  This is an awesome hair tutorial which highlights common mistakes we make when drying our hair.  We've all been guilty of some of these from time to time.

3.  We love listening to podcasts and our recent fave is called Keep It.  Host Ira Madison III takes on pop culture and politics in one podcast that is pretty darn funny.  We are constantly saying his catchphrase "keep it" about everything we are just done with!  Winter weather--keep it!  Check it out!


4.  I have never been a breakfast eater, so it's always a struggle to find something I want to eat in the morning.  Ry introduced me to this Kind Breakfast Bars which have 8 grams of protein!--J


5.  If you love The Crown like we do, you should try watching Victoria on Masterpiece on PBS.  Season 1 is streaming on Amazon Prime if you need to catch up!  Regular episodes air on PBS on Sunday nights.

6.  Speaking of royals, no matter what our mom says, we still love Meghan Markle and her fashion sense.  How about this bag she carried earlier this week?


What are you loving and living for this week?  Let us know in the comments below and have an awesome weekend, friends!

Thursday, January 18, 2018

Winter Nail Polish Picks

Each season, we like to give you our favorite picks for nail polish colors!  Here are a few of the shades we are sporting this winter.


1.  CND Shellac Midnight Swim:  The first time Jess picked this for a manicure, she spotted it on another gal two seats over at the salon who said it was her "signature color!"This color is the perfect almost-black navy with a hint of shimmer.

2.  Essie Gel Couture Model Clicks:  We (particularly Ry) are suckers for a deep, dark red.  We love the shiny finish of the Gel Couture line and this color is perfect for cozy winter weather.

3.  OPI My Gondola or Yours:  This black is perfect for wintertime.  There's a bit of sheen to this color so it's not too goth.

4.  Essie Sexy Divide:  Jess discovered this color as a stocking stuffer this Christmas.  We love the dark purple with a pinky-shimmer in direct light.

5.  CND Shellac Winter Glow:  Usually we stick with dark colors in the winter, but we love this clean light pink for a neutral look.

6.  Essie Gel Couture Once Upon a Time:  This new Enchanted Collection is so pretty and we love this not quite purple/not quite blue shade.

What's your favorite nail color this winter?  We're always looking for new colors, so let us know in the comments below!

Wednesday, January 17, 2018

The Way We Wore: Holiday Outfits

Earlier this holiday season, we showed you some of our favorite outfits for any occasion.  We thought it would be fun to share the actual outfits we wore and how we styled them for some of our holiday events.

  • Ugly Christmas Sweater Party:
As we mentioned back in a Friday Pick-Six, our cousin and his girlfriend, Kayleigh, hosted an awesome Ugly Christmas Sweater Party.  Here's what we wore:

Jess: sweater, faux leather leggings, tassel earrings, Missoni for Target heels (old!  similar)

Ry: Home Alone theme sweatshirt
  • Annual Girls Christmas Dinner:
Every year, we go out to a special dinner with just the ladies in our family.  We enjoy food and drinks, and great conversation.  It's always a great way to kick off the holiday season and spend a little girl time!

For a girls night, what's better than Lilly Pulitzer?  I'll admit due to some last minute snow, I swapped out these shoes for some boots before heading out.--J

Jess: Lilly Pulitzer Elsa top, leggings, flats

I went with a black lace top from JCrew which is sadly sold out (similar) and completed the look with one of my favorite Baublebar earrings.--R


  • Cookie Baking Party:
This year, we started a new tradition of having a little cookie baking party on Christmas Eve morning.  We thought it would be fun to bake and relax before the kick off of the big holiday celebrations.  We wanted something cozy and casual.

I wanted something cozy but not actual PJs.  I went with my favorite cardigan and comfy leggings.--J

Jess: Cardigan, graphic t-shirt, leggings and cozy socks (old, similar)
  • Christmas Eve with the Fam:
We had a great Christmas Eve party and dinner with our family.  We ate, drank and exchanged presents.  We wanted outfits that were festive but comfortable enough to chill in all night.  Here's what we wore!  

I wanted to wear something festive and comfortable, so I decided on one of my favorite sweaters with velvet leggings.  These plaid shoes are so great, too, right? --J

Jess: Boatneck tunic sweater, velvet skinny pants, plaid heels (sold out! similar), earrings (old, similar)
For Christmas Eve with the fam, I wore this festive plaid top from JCrew.  Bonus--it's flannel!  With dark jeans and my favorite tall boots, I was comfy and stylish.


  • Christmas Morning:

For opening presents and enjoying brunch, we wanted to be as comfy as possible with a holiday twist!

Who doesn't love plaid, right?  Also, these socks are sold out, but so warm!  I also laughed when I opened them because online, one sock says "naughty" and one says "nice."  I got two "naughty" socks in my order.  I guess they know me...--J

Jess: PJ Set and socks (sold out!  similar)
I went with my favorite Old Navy leggings, which I have in just about every color (this time I wore charcoal).  I added this GAP FIT tee and a slouchy cardigan that even Olivia Pope would approve.  What winter outfit is complete without a scarf?  I love the one Jess featured, but my other recent favorite is this one (and it's on sale, too!)


What was your favorite outfit from the holiday season?  Let us know in the comments below!

Monday, January 15, 2018

Homemade Cinnamon Bread

It's Jess, your friendly resident baker!  Last week, we had a surprise snow day so I found myself with an extra day at home.  I decided to bake one of my favorite recipes, the Pioneer Woman's Homemade Cinnamon Bread.  Much like my favorite Honey Oat Bread, it's not challenging, just time consuming.  It's great for any beginning bread baker!  Also, the method for the two breads is mostly the same, so once you master one, you'll have the other down quickly, too.

To get started, you'll need to gather some ingredients.  Just like Honey Oat, I usually substitute one cup of whole wheat flour because I like the taste and crumb it provides:


Heat the butter and milk together, either in the microwave or in a pan on the stove.  Make sure it cools off a bit before you add yeast, as it'll be too hot if it's just melted the butter.  Let the yeast bloom for 10-15 minutes.  While you wait, you can mix the flour and salt in one bowl and the sugar in the bowl of your mixer.


Once the yeast has done its thing, add the eggs to the sugar in your mixer.  Slowly, stream in the milk mixture (not too fast--you don't want to curdle your eggs).  You'll want your paddle attachment for this part.  Once it's mixed together, switch to your dough hook.


Knead on a medium setting for 10 minutes.  The recipe mentions what to do if the dough is too sticky, but it's never happened to me and I've made this a bunch of times.  After the 10 minutes are up, roll it into a ball.  Add a little vegetable oil to a large bowl (you can use your mixer bowl, too) and the let it rest at least two hours.  Make sure you've got a warm spot for this to happen.  In my freezing January kitchen, I preheated my oven to 200 degrees, turned it off and then let it rise in there.

After the time, here's what we had.


Roll it out into a rectangle that is about as wide as your loaf pan is long.  Brush on some more melted butter.  Hopefully, you have an adorable sous chef like I do.


Then mix up your cinnamon and sugar and sprinkle it all over the dough.


Start on one end and roll up the dough.  I like to try to pat the ends together a little as I roll, to keep it in shape.  You might have a little cinnamon-sugar falling out on the ends, but not much.  Place the dough seam-side down in your buttered loaf pan.  Brush even more butter on top (Clearly, this isn't health food) and cover for another rise.  Don't rush this.  You really need at least an hour and a half, but I prefer two hours.


Beat an egg with a little milk and brush it on top.  It's into a preheated 350 degree (or 325 convection) oven for 45-50 minutes.  I usually set a timer for 20 minutes to rotate it half-way through for a more even bake.

You'll know it's done when the top is golden brown and the internal temperature is between 190-200 degrees.  You can also tap the bottom of the loaf and hear a hollow sound.  After a time or two, you'll start to get the hang of this.


There you have it!  This stuff is delicious right out of the oven, toasted, as French Toast or any other way!

Will you give this bread a try?  If you do, let us know in the comments below!

Friday, January 12, 2018

Friday Pick-Six: 1/12/18

Here's what we're loving and living this week!

1.  You might remember that we had When Breathe Becomes Air by Paul Kalanthi and The Bright Hour by Nina Riggs on our list of non-fiction books to read last summer.  We recently read this amazing article about Paul's Widow and Nina's widower finding love together.  What a heartwarming update to their stories!

2.  If you're looking for the perfect peanut butter cookie, try these from Gimme Some Oven and thank us later!

3.  After the Golden Globes last Sunday, the gals at Go Fug Yourself have a great recap the whole night.  Can we just talk about how much we love Oprah?!

4.  I made this whole-grain breakfast cake (substituting blueberries for strawberries because that's what we had in the freezer) this week and it's been awesome!  My tweak was using 1 1/2 tsp vanilla extract and 1/2 tsp almond extract.  --J

5.  How cool are these moto leggings on sale at GAP?  Maybe they're meant for working out, but we'll be rocking them whenever we can.  Athleisure for life!


6.  If your dry winter skin could use a little help, try this Miss Spa Exfoliating Facial Scrub.  It will get rid of any dead skin and leave your skin feeling softer.


What are you loving and living for this week?  Let us know in the comments below and have a wonderful weekend!

Thursday, January 11, 2018

TTO the Trend: Loafer Mules

Although we like to think we have a pretty classic sense of style, we often like to try out new trends as they pop up.  A recent trend that we've seen around are loafers, specifically backless, mule-style loafers!  Lots of places have mentioned these as the "It-Shoe" of the fall/winter, so we finally decided to check them out.  Since it's a trendy item, we decided to try an affordable option, rather than the Gucci splurge that many bloggers are sporting.

Jess found this pair of black loafer mules at Target on sale for only $11!


What a great deal, right?  And they're an exact match for those Guccis!  You can check the next The Way We Wore post for some photos of how Jess will be wearing them soon.  In the meantime, if you want to try out this trend, here are a few options at any price point!  We included the Gucci originals so you can see just how similar they are to our Target steal!


Top Row: Target Kona, Gucci Princeton, Who What Wear for Target Rebe, Gucci Princeton Shearling

Bottom Row: Kenneth Cole Whinnie, Dolce Vita Holli, TopShop Kylie, ALDO Shahan

Would you wear loafer mules?  Let us know how you would style them in the comments below!

Wednesday, January 10, 2018

Honey Oat Bread

Hey all, it's Jess!  Last week, since it was insanely cold and I was still on winter break, I decided to bake my favorite bread.  I found 
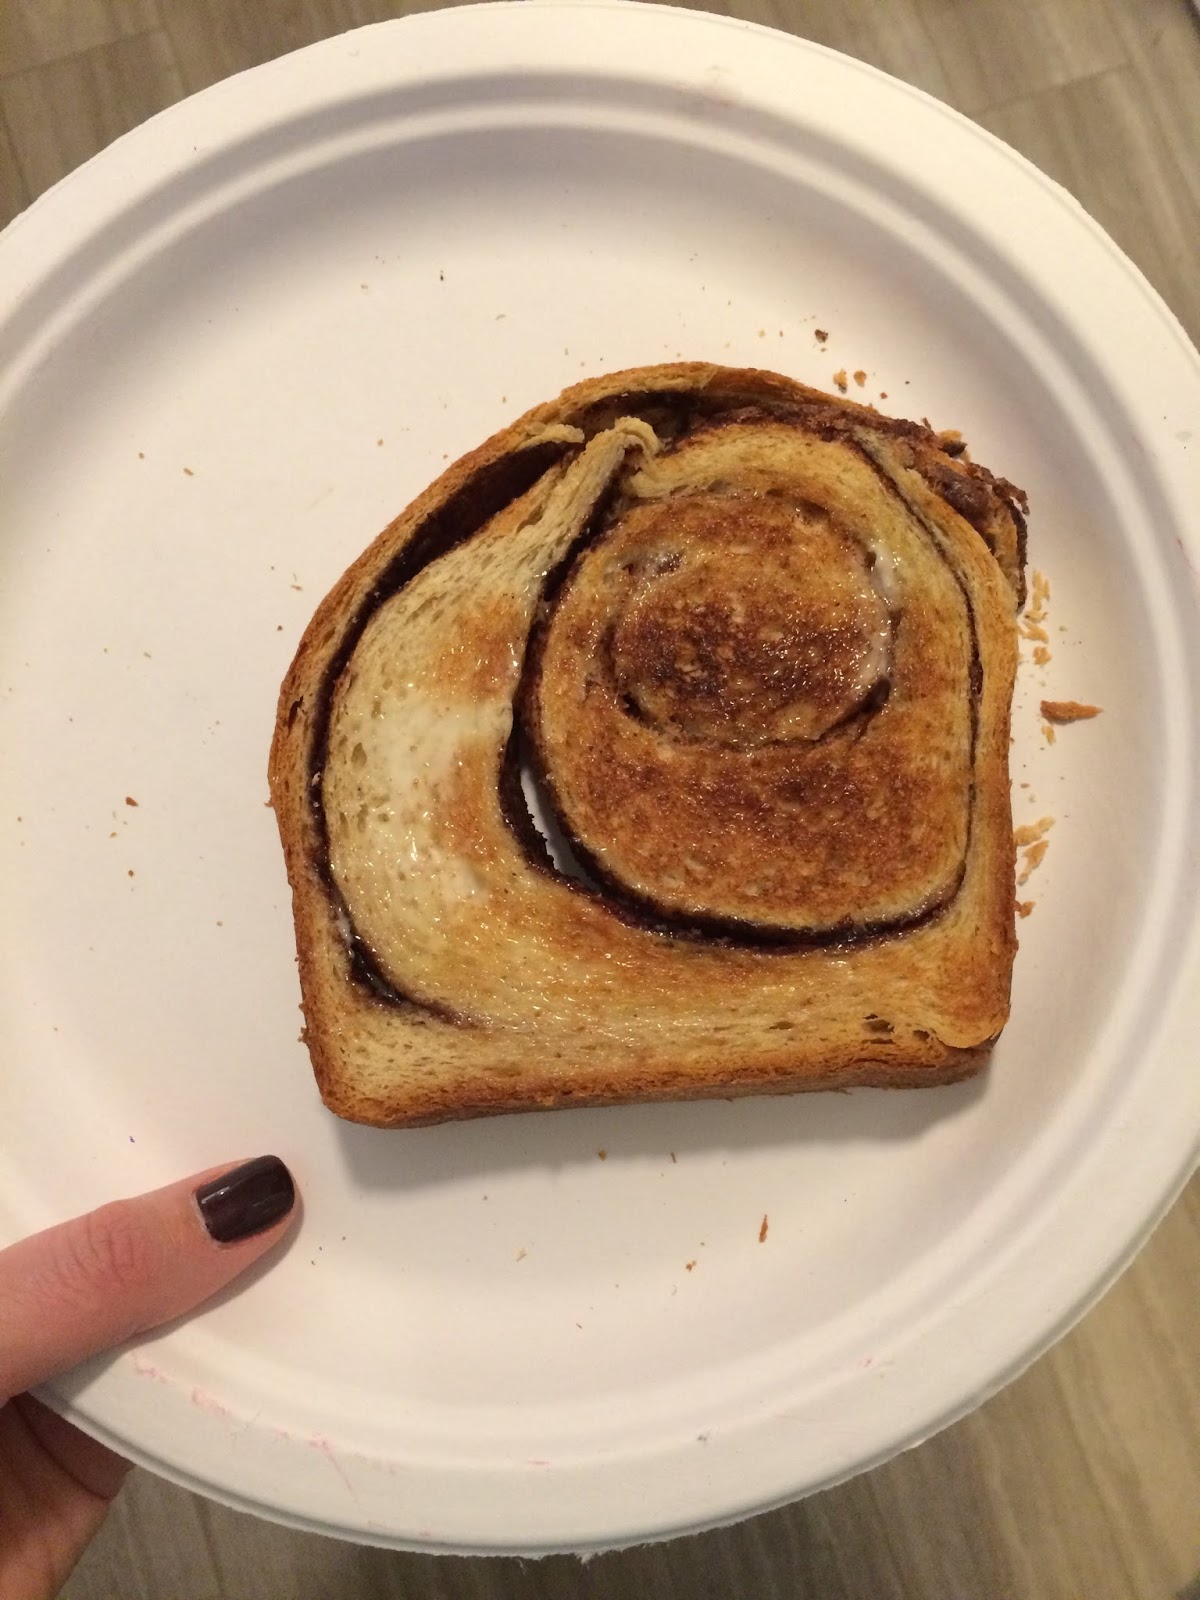
this recipe for Honey Oat Bread on Pinterest last spring and it became our family favorite. It's great for sandwiches, toast, or really anything!  Plus, it's not complicated, so even if you're new to bread making, you can easily handle it.  The only challenge is having enough time to let it rise.  You'll want to budget about 3-4 hours from start to finish.

Start off by gathering your ingredients...


You might notice that I always use half whole wheat flour and half regular as a change to the original recipe.  I think it gives a great hearty flavor and ups the fiber content.


I also started buying a larger container of yeast when I started baking bread more often.  It's much more economical than those little packets.  It will also keep in your fridge for a while.  I find if I have yeast, then I always have the ingredients for bread or homemade pizza crust.  Pro tip--2 1/4 teaspoons is the equivalent of one of those packets.

You'll want to heat the milk in the microwave, then stir in the the butter, honey and water.  In your mixer bowl, mix the flour, oats, salt and yeast.  Another baker tip--if you spray your measuring cup with cooking spray before adding the honey, then the honey won't stick.


Check the temperature of your milk mixture before adding it to the flour.  If it's too hot, it will kill your yeast.  The first few times I used a thermometer (101 or 102 degrees, but not much hotter), but now I just use my finger.  You want it a little warmer than body temperature, but not much, so it should feel warm but not hot.  You'll probably need to let it cool off a little before adding it.  Once it's the right temperature, turn on your mixer and stream in the milk mix.  The dough will start to come together.  Once it looks mixed in, turn up the speed to medium and then knead in your mixer for ten minutes.


Take the dough out and roll the dough into a smooth ball.  Take a little vegetable oil and grease the inside of your mixer bowl and put the dough back in.  Some people do this in a separate bowl, but I don't like doing dishes.  You'll need to let it rest to rise for about an hour.  In the summer, I do this on my kitchen counter.  Thanks to 8 degree temperatures outside and a drafty kitchen, I used a couple of work-arounds this time.  I turned on my oven to 200 degrees, let it preheat and then turned it off.  Then I let the bread rise in there.  Worked out just great!  After an hour, it doubled in size.


Roll out the dough into a rectangle.  The recipe suggests 12 x 9, but I don't have ruler in my kitchen.  I usually just make it the width of my loaf pan (which you also need to butter) and about twice the length.  Then take one end and roll it up like a cinnamon roll or cake roll.


Now it's time for rise number two!  Put it into your loaf pan and back into whatever rising environment worked for you last time around.


After another hour, preheat your oven to 350 (or 325 if you have a convection like me).  Here's where I changed it up from the actual recipe.  The first time I made this bread, I was in a hurry/distracted by my preschooler so I didn't do the whole "add a pan of water to add steam in the oven before baking" thing.  The bread turned out fine, so I've omitted it each time I've made it.  Try if if you want but I think it's not necessary.

Before adding it to the oven, I melt two tablespoons of butter (my addition) and honey.  I brush that on top of the bread and sprinkle on some oats.  Sometimes I also sprinkle on some sea salt.  I also always place my pan on a baking sheet to avoid any mess in the oven.


Bake for 40-50 minutes (mine takes 42 on convection).  When you pull it out, you want to check that it's golden brown on top.  You can also check the temperature to make sure it's at least 190 degrees.  This is also something you'll learn to do visually after you've made bread for a while.  You can also tap the bottom of the loaf (once it's out of the pan of course) which should sound hollow.  Now that I've made this several times, I can tell by the sound, too.


I let it cool for 5-10 minutes in the pan before I remove it to cool completely on a wire rack.  It's going to be tempting to cut it, but it will be too hard to cut if you don't want until it's cool.


There you have it!  The best bread and super easy for a beginning bread baker!  The only thing I haven't tried is doubling this recipe because we always go through it so quickly.  Give it a try and let me know what you think in the comments.  Happy baking!